Grandma's Home Videos Are Fading — Here's How to Save Them Before It's Too Late
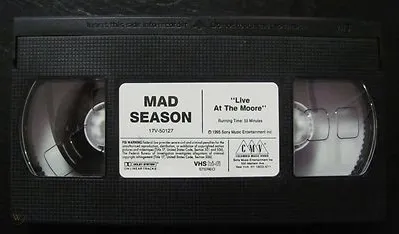
Photo: SMV Enterprises, Public domain, via Wikimedia Commons
There's a shoebox in a lot of American homes. Maybe it's in the basement, maybe the back of a closet, maybe your parents' garage. Inside: a jumble of VHS tapes, chunky Mini-DV cassettes, maybe a few 8mm reels, and possibly an old hard drive that hasn't been plugged in since the early 2000s. On those tapes and drives are birthday parties, holiday mornings, first steps, family road trips — moments that exist nowhere else on earth.
Here's the uncomfortable truth: those tapes are dying. Magnetic tape degrades. Hard drives fail. And the window to rescue this footage is narrower than most families realize.
The good news? Digitizing old home videos has never been more accessible. You don't need a professional studio or a media preservation degree. With the right tools and a little patience, you can convert those aging tapes into digital files that will outlast all of us.
Understanding What You're Working With
Before you start buying cables and downloading software, take stock of what formats you're actually dealing with. Different media types require different capture approaches.
VHS tapes are the most common format families encounter. They were the standard home recording format from roughly the late '70s through the early 2000s. The good news is that VHS players are still fairly easy to find secondhand. The bad news is that VHS tape quality was never great to begin with, and it only degrades with age.
Mini-DV cassettes were popular with the camcorders of the late '90s and 2000s. These are actually a much better starting point than VHS because Mini-DV recorded digital video — meaning if you can get the footage off the tape, the quality will be significantly better than an analog source.
8mm and Hi8 tapes came from an earlier generation of compact camcorders and are a bit trickier, since the players are harder to source.
Old hard drives and memory cards are a different challenge entirely — the media itself may still be intact, but the files might be in obscure formats that modern devices can't play back without conversion.
Know your formats before you invest in any equipment, because the capture hardware for VHS is completely different from what you'd use for Mini-DV.
Option 1: DIY Capture With a Hardware Converter
For the hands-on crowd, capturing footage yourself gives you the most control over quality and costs less over time — especially if you have a lot of tapes to work through.
For VHS, you'll need:
- A working VHS player (thrift stores and eBay are your friends here)
- A video capture device — a USB capture card that accepts composite (RCA) input works well and typically runs $30–$80
- A laptop or desktop with enough storage space
The capture device connects your VHS player to your computer and converts the analog signal into a digital file in real time. You play the tape, the software records it. It's not instant — a two-hour tape takes two hours to capture — but it's straightforward.
For Mini-DV, the process is actually cleaner. Most Mini-DV camcorders have a FireWire (also called IEEE 1394 or i.Link) output. If your computer has a FireWire port — or you pick up an adapter — you can transfer footage digitally, which preserves the original quality without any analog conversion step.
Recommended capture software: OBS Studio (free), WinDV (free, great for Mini-DV), or Adobe Premiere if you're already in the Adobe ecosystem.
Option 2: Mail-In Digitization Services
If the DIY route sounds like too much, a handful of reputable services will digitize your tapes for you. You ship the tapes, they capture and convert the footage, and you get back a thumb drive, a download link, or both.
Services like Legacybox and iMemories are popular options in the US, with pricing that typically ranges from $10–$25 per tape depending on the service tier. It's more expensive than doing it yourself, but if you only have a handful of tapes and no interest in buying hardware, it's a completely reasonable choice.
One caution: always make sure you're shipping copies where possible, and use a tracked shipping method. These tapes are irreplaceable.
Converting Your Captured Files: Getting the Format Right
Once you've captured your footage — either through DIY or a service — you'll likely end up with files in formats that aren't ideal for long-term storage or easy sharing. Capture software often produces large, uncompressed AVI files or proprietary formats. This is where conversion becomes essential.
For archival storage, you want a format that prioritizes quality over file size. H.264 in an MP4 container strikes a solid balance — it's widely compatible, produces manageable file sizes, and maintains good visual quality. For maximum quality preservation, ProRes or a lossless codec like FFV1 is worth considering if storage space isn't a concern.
For sharing with family, MP4 with H.264 encoding is the universal winner. It plays on every device, uploads to Google Photos, iCloud, YouTube (for private sharing), and any other platform without a fuss.
A good video converter lets you batch process multiple files, choose your output codec and resolution, and even upscale older footage slightly for better playback on modern screens.
Quick conversion tips for old footage:
- Don't try to upscale VHS footage to 4K — the source quality isn't there to support it, and you'll end up with an artificially blurry mess
- 480p or 720p is a realistic output target for VHS content
- Mini-DV footage can often be exported at 1080p and will look genuinely good
- Preserve the original captured file as a backup before you start converting
Storage: The Part Most People Skip
Digitizing your family videos only matters if those digital files survive. And digital files are more fragile than most people assume — hard drives fail, computers get stolen, and cloud services get discontinued.
The gold standard for personal media preservation is the 3-2-1 backup rule:
- 3 copies of your files
- On 2 different types of storage media
- With 1 copy stored off-site
In practical terms for most families, that looks like: files on your main computer, a copy on an external hard drive kept at home, and a copy in cloud storage (Google Drive, Amazon Photos, iCloud, or Backblaze are all solid options).
For a collection of digitized home videos, you're probably looking at 50–200 GB of storage depending on how much footage you have and what format you've converted to. A 2TB external hard drive runs about $60–$80 at most US retailers — a small price for irreplaceable memories.
The Best Time to Start Was Yesterday
Magnetic tape loses roughly 10–20% of its signal quality per decade. VHS tapes recorded in the 1980s have already lost significant data, and every year you wait, the situation gets worse. There's no recovering footage from a tape that's deteriorated past a certain point.
If you've been meaning to tackle this project "eventually," make this the year you actually do it. The hardware is affordable, the software is accessible, and the process — while time-consuming — is genuinely manageable for anyone willing to sit down and work through it.
Your family's memories deserve better than a shoebox in the garage. Give them a format that will last.